
This article is for users with individual accounts. If your clinic has a Tali organization account, see the relevant article here. here
This article covers:
- How to invite an MOA
- How MOAs accept their invitation and log in
- What MOAs can do in the Appointments tab
Note: MOAs added to your Tali account will have access to your existing data, including past and future appointments and patient information.
Inviting an MOA
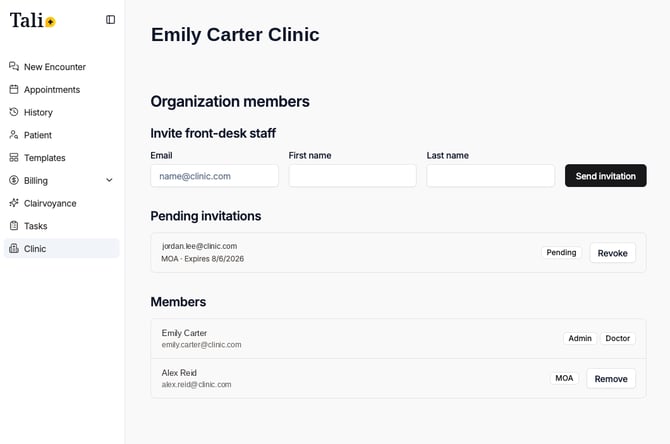
- Log in to Tali and open the new Clinic tab you can now see in the sidebar.
- Under Invite a member, enter the MOA's email, first name, and last name.
- Click Send invitation.
The invitation appears under Pending invitations until it's accepted. Each pending invitation shows its expiry date.
To cancel an invitation before it's accepted, click Revoke next to it under Pending invitations.
Once the MOA accepts, they appear in the Members list with an MOA badge.
Accepting the invitation (for MOAs)
- Open the invitation email from Tali and click Accept invitation.
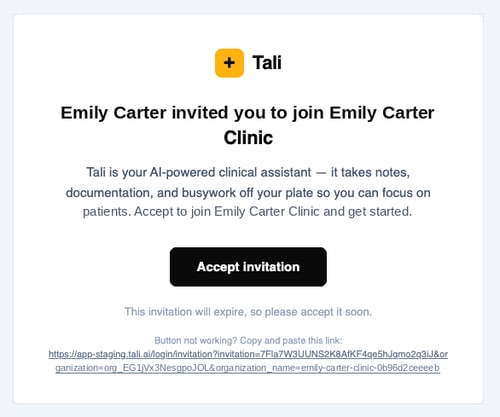
- Review and accept the Terms of Use and Privacy Policy, then click Continue.
- You'll land on Tali's login page.
- Enter the same email you received the invite from.
- The login code will be sent to the same email.
The invitation link expires, so accept it soon after receiving it. If it has expired, ask the clinician to send a new one.
For future sessions, go to app.tali.ai and follow the sign-in instructions.
Working with appointments (for MOAs)
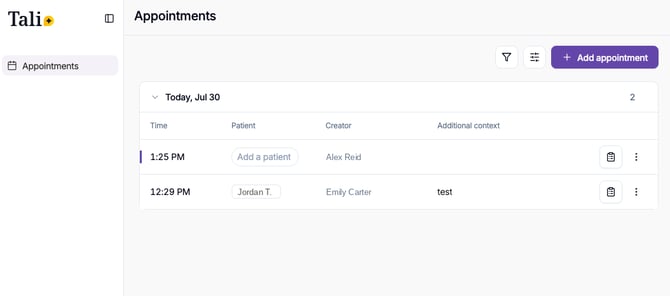
When you log in as an MOA, you'll see the Appointments tab. It shows the appointments created by the clinician, organized by day, with the time, patient, provider, and any additional context for each appointment.
Your name—or the clinician’s name—will appear under Creator for any appointments you create.
Create an appointment
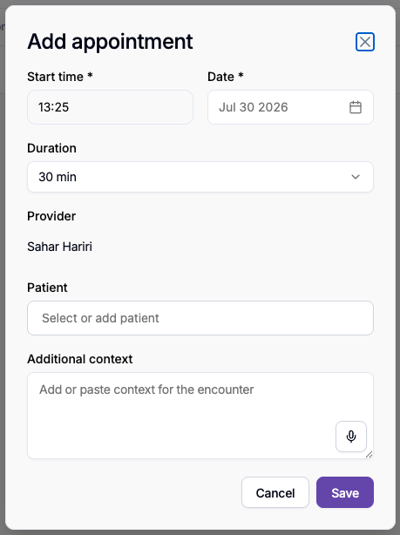
- Click Add appointment.
- Set the start time, date, and duration.
- Under Patient, select or add the patient. The patient list belongs to the selected provider, so choose the provider first.
- Optionally, add context for the encounter under Additional context — type, paste, or dictate it using the microphone.
- Click Save.
Edit an appointment
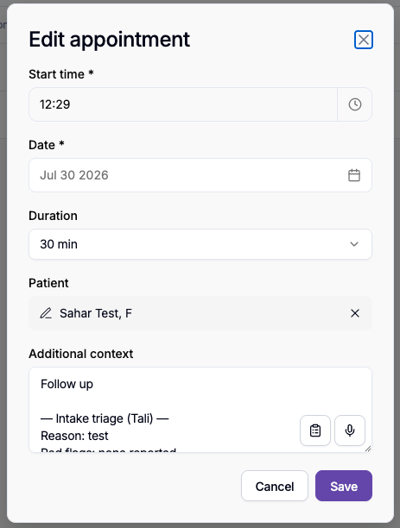
- Click the ⋮ menu on the appointment and select Edit.
- Update the details as needed and click Save.
Run an intake triage
Click the intake icon on an appointment to run an intake triage for it.
How to run an intake triage > link